Moodle is one of the best learning management systems available. It’s an open software, released under the open source ‘GNU General Public License’ which makes it highly flexible and customizable. In this guide you will learn how to install Moodle on Ubuntu server 20.04/22.04.
We are installing Moodle on a brand new, clean Ubuntu server with no software or data on it. If your server has data on it - make data backup first. Author is not responsible for possible data loss.
ก่อนที่คุณจะเริ่มต้น
ตรวจสอบของเรา บริการโฮสติ้งสำหรับ Moodle ฉบับชุมชน คุณสามารถเริ่มใช้ LMS ได้โดยไม่จำเป็นต้องติดตั้ง!
ข้อกำหนดเบื้องต้น
- ติดตั้งก เซิร์ฟเวอร์วีพีเอส ด้วย Ubuntu 22.04 อยู่
- รับคุณสมบัติครบถ้วน ชื่อโดเมน pointing to your server’s IP address, such as “moodle.example.org”
เราจะใช้โดเมนเพื่อเป็นตัวอย่างในคู่มือนี้ Moodle.example.orgให้เปลี่ยนเป็นชื่อโดเมนของคุณเอง
กำลังเตรียมเซิร์ฟเวอร์ Ubuntu สำหรับการติดตั้ง Moodle
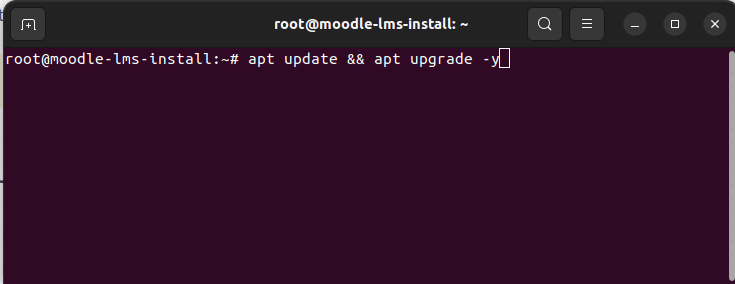
อัพเดตระบบ
First thing first – updating the system. To get started connect to your server via SSH. Then run “apt update” and “apt upgrade” commands to update system packages to the latest version.
$ sudo apt update && apt upgrade -y
ติดตั้งเซิร์ฟเวอร์ Apache, PHP-8.1, MariaDB MySQL
ถัดไปติดตั้งการพึ่งพา Moodle เราจำเป็นต้องติดตั้งเว็บเซิร์ฟเวอร์ Apache, PHP 8.1, เซิร์ฟเวอร์ MariaDB SQL, เมลเซิร์ฟเวอร์ และรายการส่วนขยาย PHP ที่ Moodle ต้องการ
$ sudo apt install apache2 php8.1 mariadb-server postfix
$ sudo apt install php8.1-mysql php8.1-fpm php8.1-iconv php8.1-mbstring php8.1-curl php8.1-tokenizer php8.1-xmlrpc php8.1-soap php8.1-ctype php8.1-zip php8.1-gd php8.1-simplexml php8.1-xml php8.1-intl
เมื่อการติดตั้งเสร็จสิ้นให้เริ่มเว็บเซิร์ฟเวอร์ apache
$ sudo systemctl start apache2
$ sudo systemctl enable apache2
กำหนดค่า Apache VirtualHost และ PHP-FPM
เราจะใช้งาน Moodle 4.2 บน Apache และ PHP-FPM ในขั้นตอนถัดไปเราจะกำหนดค่า PHP-FPM สำหรับ Apache
1. เริ่มบริการ PHP-FPM และเปิดใช้งานเมื่อบู๊ตเครื่อง
$ sudo systemctl start php8.1-fpm
$ sudo systemctl enable php8.1-fpm
2. หากต้องการใช้ PHP-FPM กับ Apache เราจำเป็นต้องเปิดใช้งาน proxy_fcgi และโมดูลพร็อกซี
sudo a2enmod proxy_fcgi proxy
3. สร้างไฟล์การกำหนดค่า Apache สำหรับ Moodle
$ sudo nano /etc/apache2/sites-available/moodle.conf
ป้อนการกำหนดค่าต่อไปนี้ลงใน Moodle.conf แทนที่ ชื่อเซิร์ฟเวอร์, DocumentRoot, ไดเร็กทอรี ด้วยคุณค่าของคุณ
<VirtualHost *:80>
ServerName Moodle.example.org
ServerAlias www.Moodle.example.org
DocumentRoot /home/moodle/public_html

<Directory /home/moodle/public_html>
Options -Indexes +FollowSymLinks +MultiViews
AllowOverride All
Require all granted
</Directory>

<FilesMatch \.php$>
SetHandler "proxy:unix:/run/php/php8.1-fpm.sock|fcgi://localhost/"
</FilesMatch>

ErrorLog ${APACHE_LOG_DIR}/error.log
CustomLog ${APACHE_LOG_DIR}/access.log combined
</VirtualHost>
บันทึกและปิดไฟล์ด้วย CTRL X จากนั้น Y จากนั้น Enter
4. เปิดใช้งานโฮสต์เสมือนใหม่และโหลดเว็บเซิร์ฟเวอร์ Apache อีกครั้ง
$ a2ensite moodle
$ systemctl reload apache2
5. Also it’s nice to have a rewrite and SSL modules enabled
# a2enmod rewrite
# a2enmod ssl
# systemctl restart apache2
สร้างฐานข้อมูลและผู้ใช้ฐานข้อมูล
1. เริ่มต้นและเปิดใช้งานเซิร์ฟเวอร์ MariaDB SQL
root@moodle-lms-install:~# systemctl start mariadb
root@moodle-lms-install:~# systemctl enable mariadb
2. สร้างผู้ใช้และฐานข้อมูล MySQL
root@moodle-lms-install:~# mysql
MariaDB [(none)]> create database moodle_dev;
MariaDB [(none)]> grant all privileges on moodle_dev.* to moodle_user@localhost identified by 'Change_to_Strong_SQL_Password';
MariaDB [(none)]> flush privileges;
เมื่อเรากำหนดค่า Apache, PHP และ MySQL แล้ว เราก็สามารถดำเนินการติดตั้งโค้ด Moodle ต่อไปได้
ติดตั้งโค้ด Moodle
1. สร้างโฮมไดเร็กตอรี่สำหรับไซต์ Moodle และไดเร็กทอรีสาธารณะ
$ useradd --create-home -s /bin/sh moodle
$ mkdir -p /home/moodle/public_html
$ chmod 711 /home/moodle
2. ดาวน์โหลดโค้ด Moodle ล่าสุดและแยกลงในไดเร็กทอรีสาธารณะ
คุณสามารถดาวน์โหลด Moodle ล่าสุดได้จาก https://download.moodle.org/releases/latest/. Get the code and upload it into the public directory. In our case the directory is “/home/moodle/public_html”
เรียกใช้การติดตั้งในเบราว์เซอร์
ก่อนที่คุณจะดำเนินการขั้นตอนสุดท้ายนี้ คุณจะต้องชี้ชื่อโดเมนของคุณไปยังที่อยู่ IP ของเซิร์ฟเวอร์ของคุณ เมื่อกำหนดค่า DNS แล้ว คุณสามารถเรียกใช้การติดตั้ง Moodle ในเบราว์เซอร์ได้
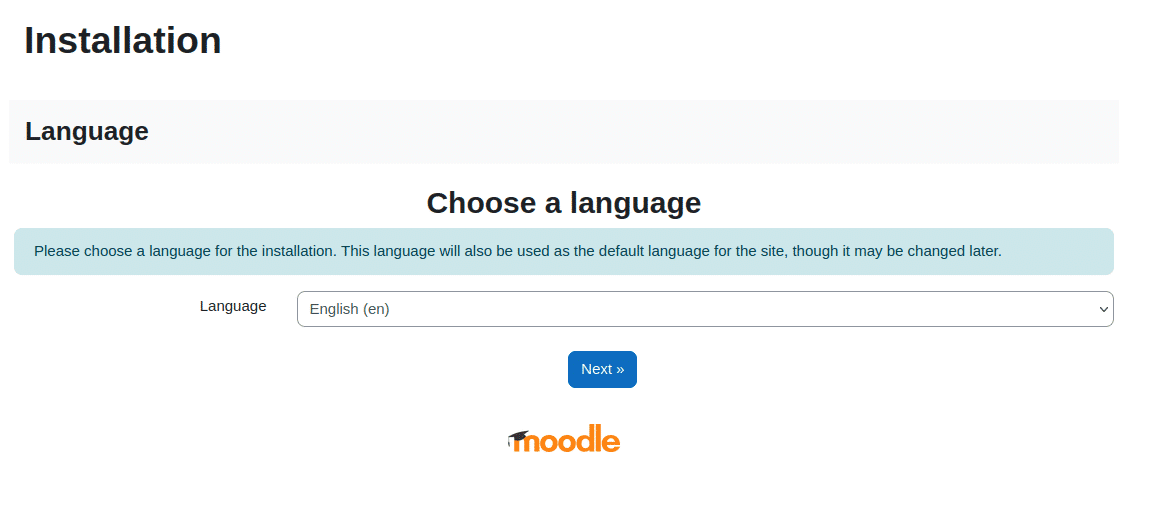
1. Open your browser and navigate to your Moodle’s site domain/sub-domain. You should see Moodle Installation page.
2. Choose website’s language. We will keep English.
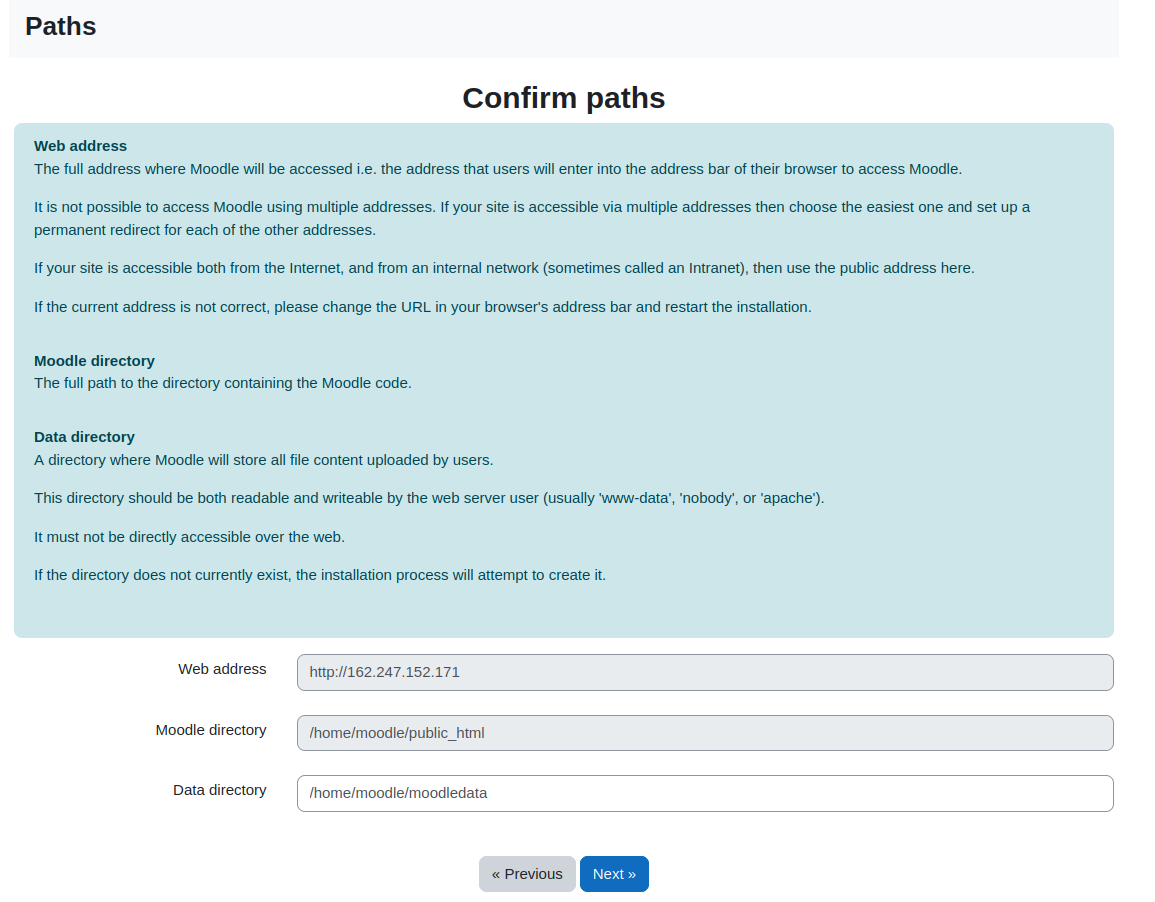
3. ยืนยันเส้นทาง
ในขั้นตอนถัดไป ให้ยืนยันว่าที่อยู่เว็บ ไดเร็กทอรี Moodle และไดเร็กทอรีข้อมูลถูกต้อง ไดเร็กทอรีข้อมูลหายไปในการติดตั้งของเรา ดังนั้นเราจึงสร้างมันขึ้นมาในขั้นตอนนี้
# mkdir /home/moodle/moodledata
# chown www-data:www-data /home/moodle/moodledata
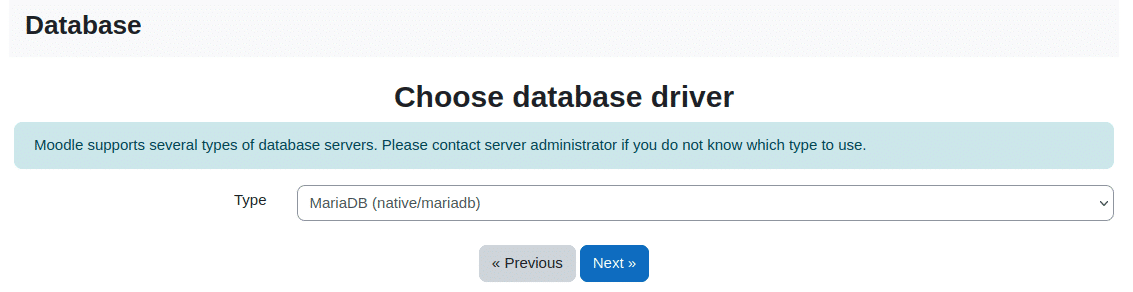
4. เลือกเซิร์ฟเวอร์ฐานข้อมูล
เราใช้ MariaDB สำหรับคำแนะนำนี้ เลือก MariaDB จากเมนูแบบเลื่อนลง
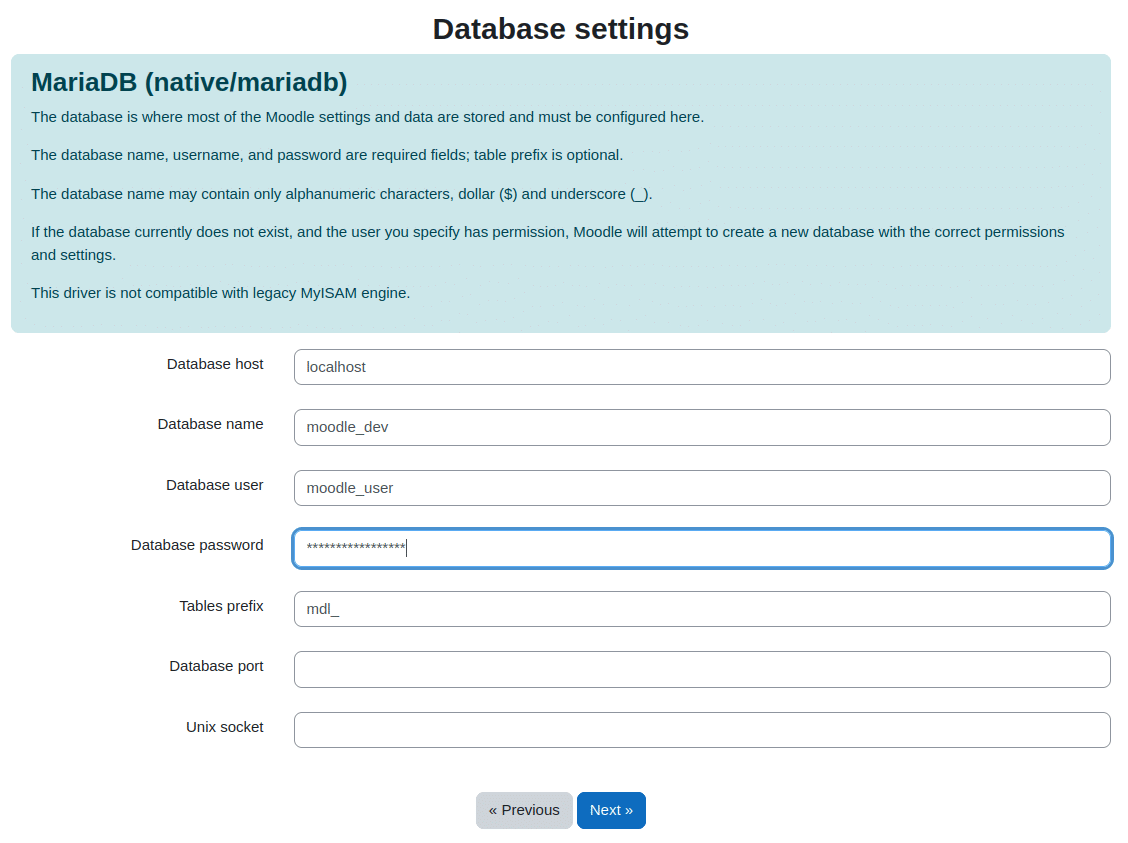
5. เข้าสู่การตั้งค่าฐานข้อมูล
ใส่ชื่อฐานข้อมูล ผู้ใช้ฐานข้อมูล และรหัสผ่านที่เราสร้างไว้ก่อนหน้านี้
6. สร้างไฟล์ config.php
After entering database settings and clicking “Next” a config.php file will be generated. Copy content of the file and create “config.php” in the root moodle directory (/home/moodle/public_html in this example).
7. ยอมรับใบอนุญาต
คุณต้องอ่านและยอมรับข้อตกลงสิทธิ์การใช้งาน Moodle ในขั้นตอนนี้
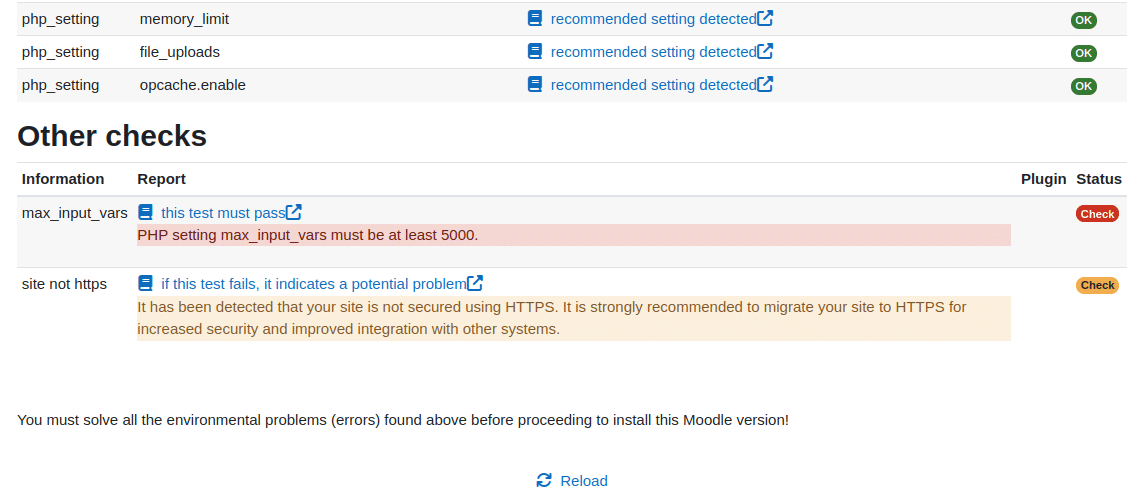
8. ผ่านการตรวจสอบเซิร์ฟเวอร์
Most of the checks passed in our installation. We only had to change “max_input_vars” from its default value to 5000.
$ nano /etc/php/8.1/fpm/php.ini
$ systemctl reload php8.1-fpm
9. กำหนดค่าบัญชีผู้ดูแลระบบหลักของคุณ
ในขั้นตอนนี้ คุณควรกำหนดค่าบัญชีผู้ดูแลระบบ ป้อนชื่อผู้ใช้ รหัสผ่าน และรายละเอียดที่จำเป็นอื่นๆ
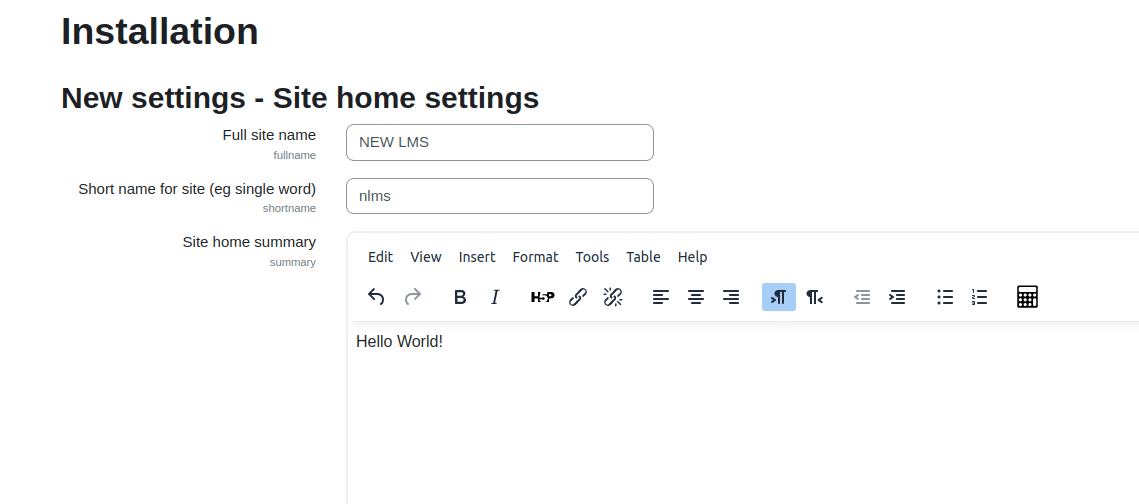
10. เข้าสู่การตั้งค่าหน้าแรกของไซต์
กำหนดค่าชื่อไซต์ ชื่อย่อสำหรับไซต์ สรุปหน้าแรกของไซต์ และข้อมูลอื่น ๆ
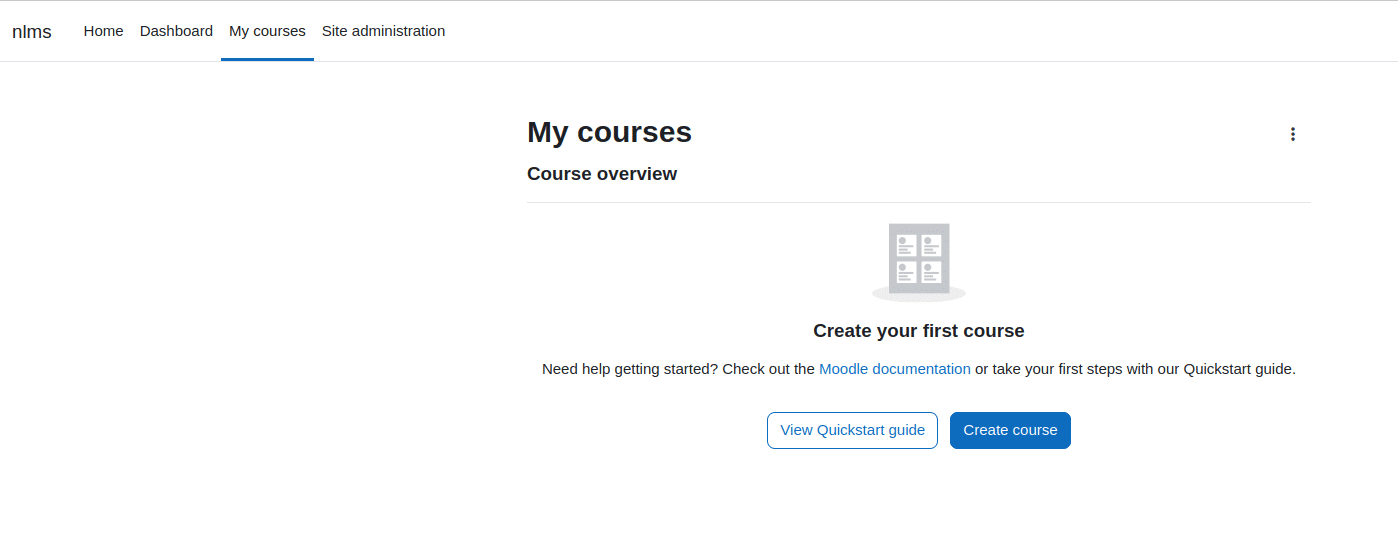
สร้างหลักสูตรแรกของคุณ!
After few final clicks you will see the LMS dashboard and Calendar. Proceed to “My Courses” tab and create your first Moodle course! Well done!