Moodle is one of the best learning management systems available. It’s an open software, released under the open source ‘GNU General Public License’ which makes it highly flexible and customizable. In this guide you will learn how to install Moodle on Ubuntu server 20.04/22.04.
We are installing Moodle on a brand new, clean Ubuntu server with no software or data on it. If your server has data on it - make data backup first. Author is not responsible for possible data loss.
Trước khi bạn bắt đầu
Kiểm tra của chúng tôi dịch vụ lưu trữ cho Moodle bản cộng đồng. Bạn có thể bắt đầu sử dụng LMS mà không cần cài đặt nó!
Yêu cầu trước
- Cài đặt một máy chủ VPS với Ubuntu 22.04 trên đó
- Có được một trình độ đầy đủ tên miền pointing to your server’s IP address, such as “moodle.example.org”
Đối với các ví dụ trong hướng dẫn này, chúng tôi sẽ sử dụng tên miền moodle.example.org, hãy đổi nó thành tên miền của riêng bạn.
Chuẩn bị máy chủ Ubuntu để cài đặt Moodle
Cập nhật hệ thống
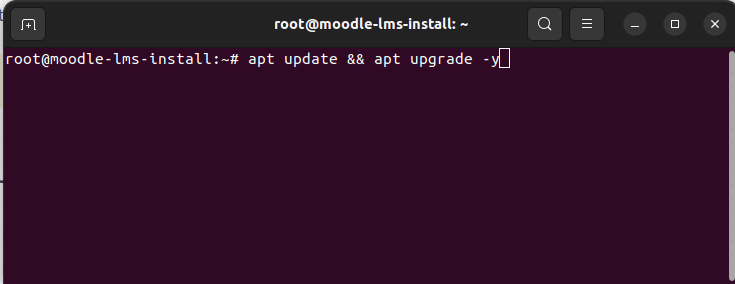
First thing first – updating the system. To get started connect to your server via SSH. Then run “apt update” and “apt upgrade” commands to update system packages to the latest version.
$ sudo apt update && apt upgrade -y
Cài đặt máy chủ Apache, PHP-8.1, MariaDB MySQL
Tiếp theo cài đặt phụ thuộc Moodle. Chúng ta cần cài đặt máy chủ web Apache, PHP 8.1, máy chủ SQL MariaDB, máy chủ thư và danh sách các tiện ích mở rộng PHP được Moodle yêu cầu.
$ sudo apt install apache2 php8.1 mariadb-server postfix
$ sudo apt install php8.1-mysql php8.1-fpm php8.1-iconv php8.1-mbstring php8.1-curl php8.1-tokenizer php8.1-xmlrpc php8.1-soap php8.1-ctype php8.1-zip php8.1-gd php8.1-simplexml php8.1-xml php8.1-intl
Khi cài đặt hoàn tất, hãy khởi động máy chủ web Apache.
$ sudo systemctl start apache2
$ sudo systemctl enable apache2
Định cấu hình Apache Virtualhost và PHP-FPM
Chúng tôi sẽ chạy Moodle 4.2 trên Apache và PHP-FPM. Ở bước tiếp theo, chúng tôi sẽ định cấu hình PHP-FPM cho Apache.
1. Khởi động dịch vụ PHP-FPM và kích hoạt nó khi khởi động.
$ sudo systemctl start php8.1-fpm
$ sudo systemctl enable php8.1-fpm
2. Để sử dụng PHP-FPM với Apache, chúng ta cần kích hoạt các mô-đun proxy_fcgi và proxy.
sudo a2enmod proxy_fcgi proxy
3. Tạo file cấu hình Apache cho Moodle.
$ sudo nano /etc/apache2/sites-available/moodle.conf
Nhập cấu hình sau vào moodle.conf. Thay thế Tên máy chủ, DocumentRoot, Thư mục với những giá trị của bạn.
<VirtualHost *:80>
ServerName moodle.example.org
ServerAlias www.moodle.example.org
DocumentRoot /home/moodle/public_html

<Directory /home/moodle/public_html>
Options -Indexes +FollowSymLinks +MultiViews
AllowOverride All
Require all granted
</Directory>

<FilesMatch \.php$>
SetHandler "proxy:unix:/run/php/php8.1-fpm.sock|fcgi://localhost/"
</FilesMatch>

ErrorLog ${APACHE_LOG_DIR}/error.log
CustomLog ${APACHE_LOG_DIR}/access.log combined
</VirtualHost>
Lưu và đóng tệp bằng CTRL X, rồi Y, rồi Enter.
4. Kích hoạt máy chủ ảo mới và tải lại máy chủ web Apache.
$ a2ensite moodle
$ systemctl reload apache2
5. Also it’s nice to have a rewrite and SSL modules enabled
# a2enmod rewrite
# a2enmod ssl
# systemctl restart apache2
Tạo cơ sở dữ liệu và người dùng cơ sở dữ liệu
1. Khởi động và kích hoạt máy chủ MariaDB SQL
root@moodle-lms-install:~# systemctl start mariadb
root@moodle-lms-install:~# systemctl enable mariadb
2. Tạo người dùng và cơ sở dữ liệu MySQL
root@moodle-lms-install:~# mysql
MariaDB [(none)]> create database moodle_dev;
MariaDB [(none)]> grant all privileges on moodle_dev.* to moodle_user@localhost identified by 'Change_to_Strong_SQL_Password';
MariaDB [(none)]> flush privileges;
Khi đã cấu hình xong Apache, PHP và MySQL, chúng ta có thể tiến hành cài đặt mã moodle.
Cài đặt mã Moodle
1. Tạo thư mục chính cho trang Moodle và thư mục chung
$ useradd --create-home -s /bin/sh moodle
$ mkdir -p /home/moodle/public_html
$ chmod 711 /home/moodle
2. Tải xuống mã Moodle mới nhất và giải nén nó vào thư mục chung.
Bạn có thể tải moodle mới nhất từ https://download.moodle.org/releases/latest/. Get the code and upload it into the public directory. In our case the directory is “/home/moodle/public_html”
Chạy cài đặt trong trình duyệt
Trước khi tiến hành bước cuối cùng này, bạn cần trỏ tên miền của mình đến địa chỉ IP của máy chủ. Khi DNS được cấu hình, bạn có thể chạy cài đặt Moodle trong trình duyệt.
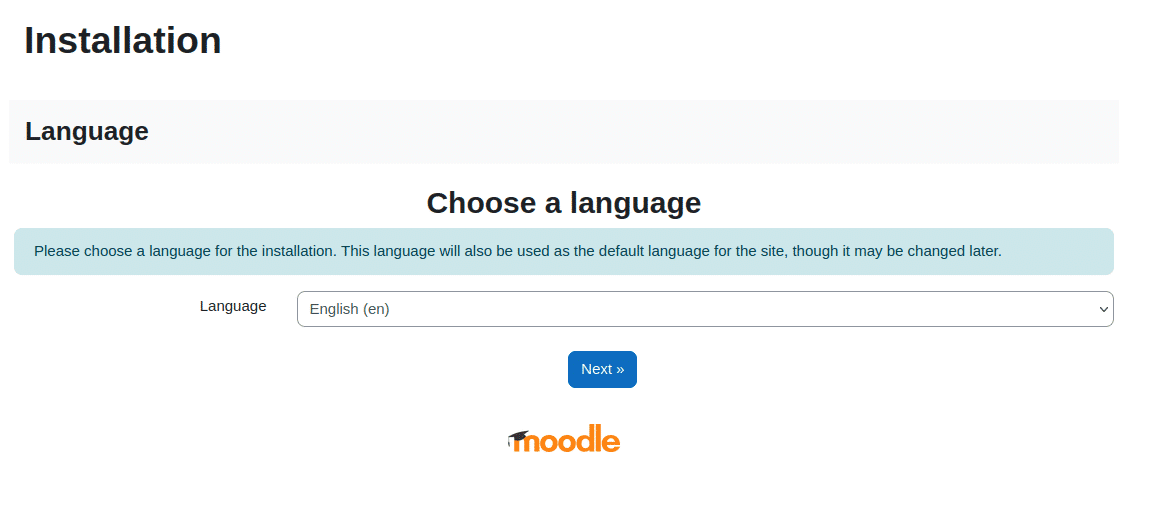
1. Open your browser and navigate to your Moodle’s site domain/sub-domain. You should see Moodle Installation page.
2. Choose website’s language. We will keep English.
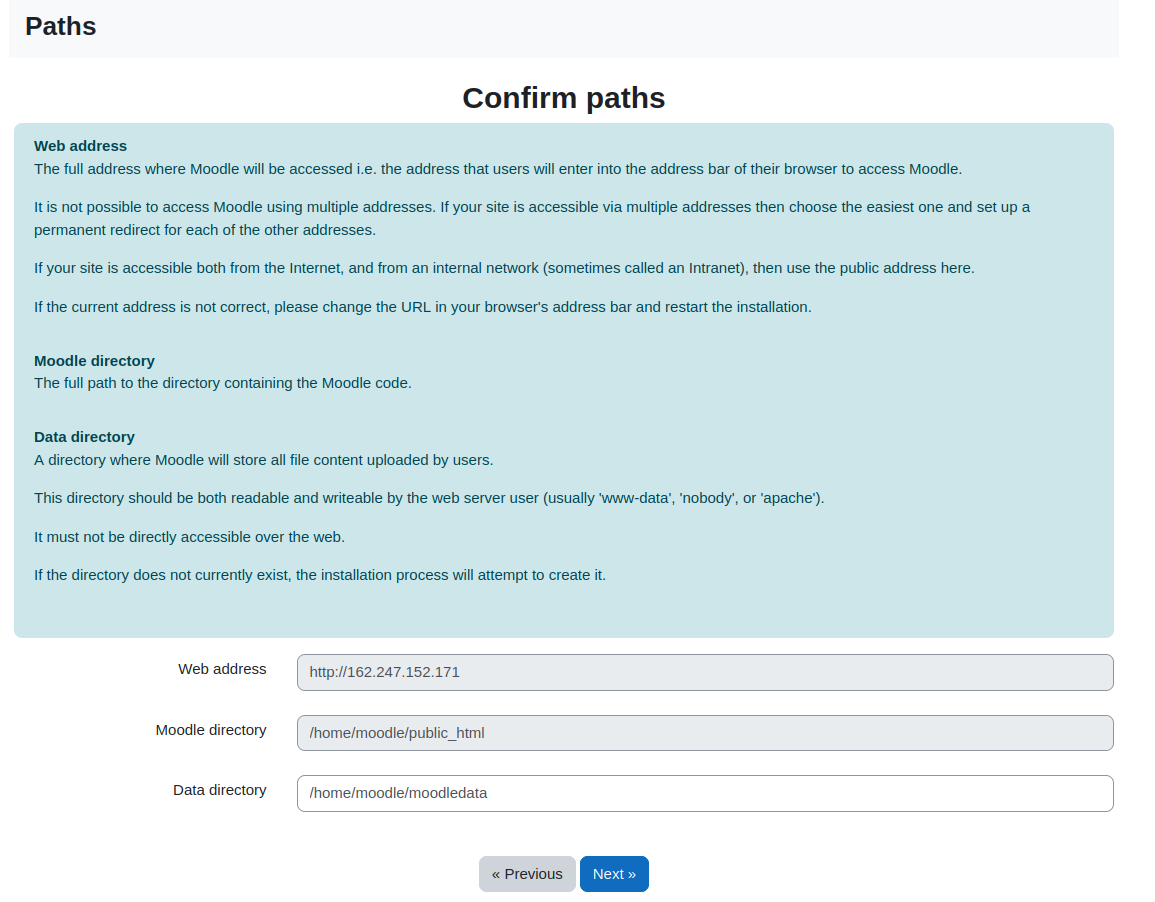
3. Xác nhận đường dẫn
Ở bước tiếp theo, hãy xác nhận rằng địa chỉ web, thư mục moodle và thư mục dữ liệu là chính xác. Thư mục dữ liệu bị thiếu trong quá trình cài đặt của chúng tôi, vì vậy chúng tôi đã tạo nó ở bước này.
# mkdir /home/moodle/moodledata
# chown www-data:www-data /home/moodle/moodledata
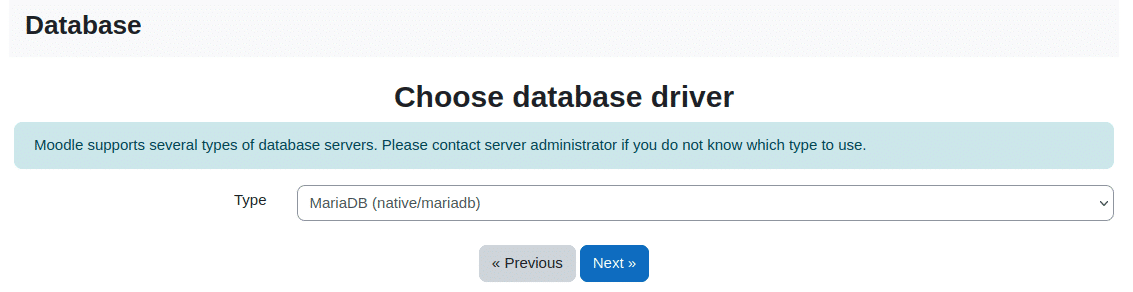
4. Chọn máy chủ cơ sở dữ liệu
Chúng tôi sử dụng MariaDB cho hướng dẫn này. Chọn MariaDB từ menu thả xuống.
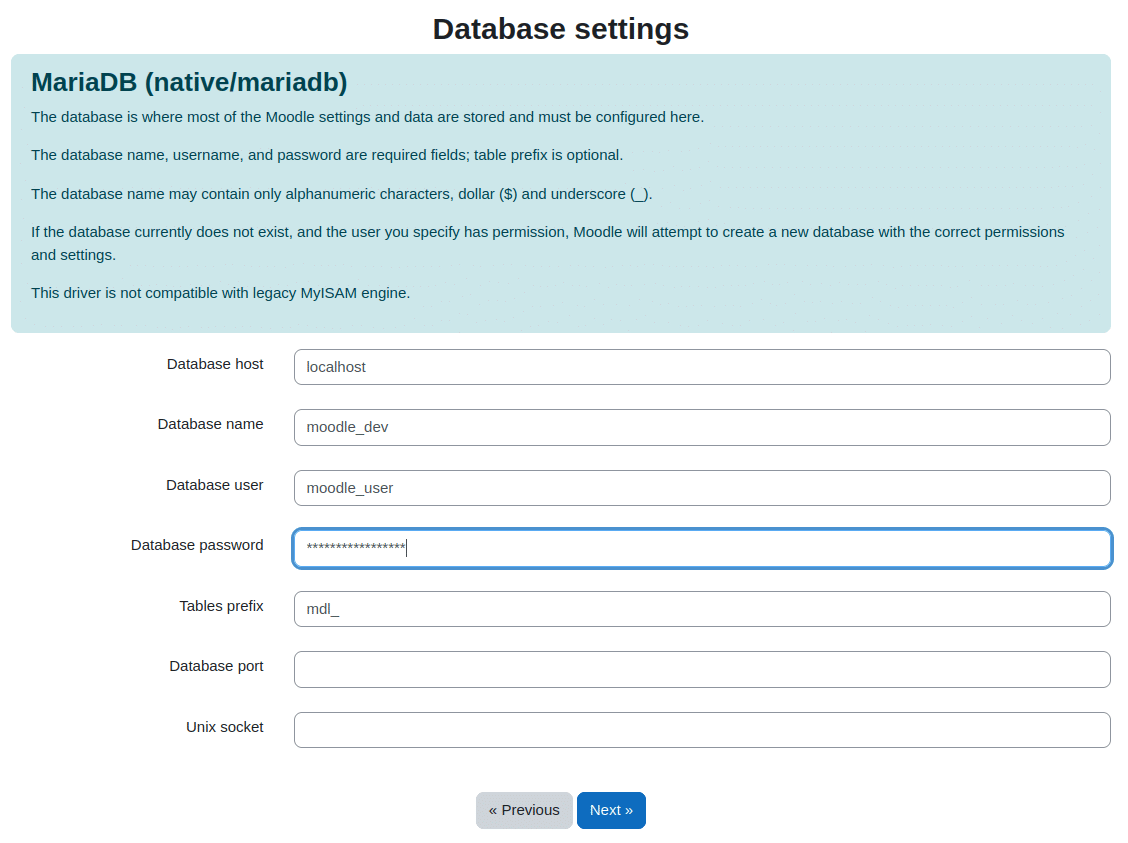
5. Nhập cài đặt cơ sở dữ liệu
Nhập tên cơ sở dữ liệu, người dùng cơ sở dữ liệu và mật khẩu mà chúng tôi đã tạo trước đó.
6. Tạo file config.php
After entering database settings and clicking “Next” a config.php file will be generated. Copy content of the file and create “config.php” in the root moodle directory (/home/moodle/public_html in this example).
7. Chấp nhận giấy phép
Bạn phải đọc và chấp nhận thỏa thuận cấp phép Moodle ở bước này.
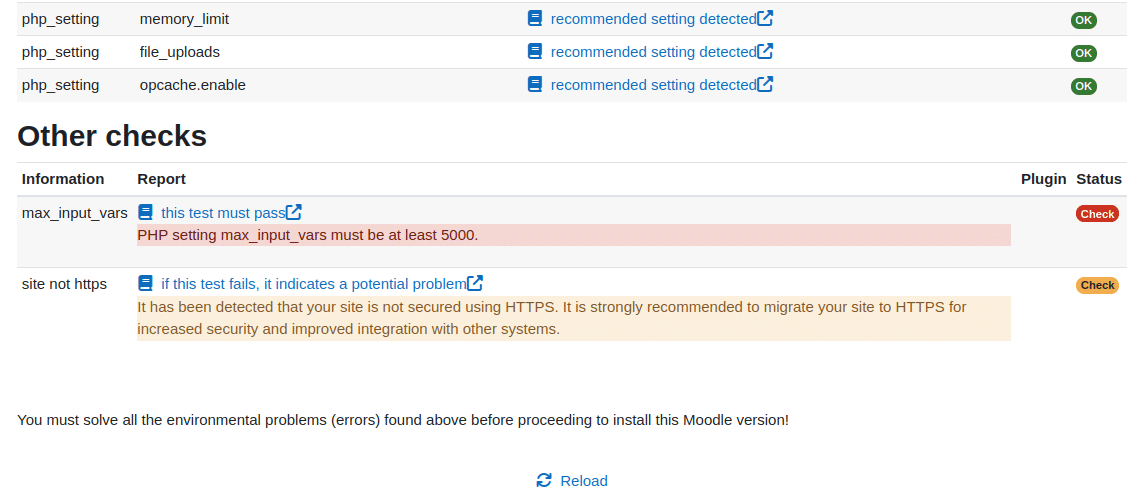
8. Vượt qua kiểm tra máy chủ
Most of the checks passed in our installation. We only had to change “max_input_vars” from its default value to 5000.
$ nano /etc/php/8.1/fpm/php.ini
$ systemctl reload php8.1-fpm
9. Định cấu hình tài khoản quản trị viên chính của bạn
Ở bước này, bạn nên cấu hình tài khoản quản trị viên. Nhập tên người dùng, mật khẩu của quản trị viên và các chi tiết cần thiết khác.
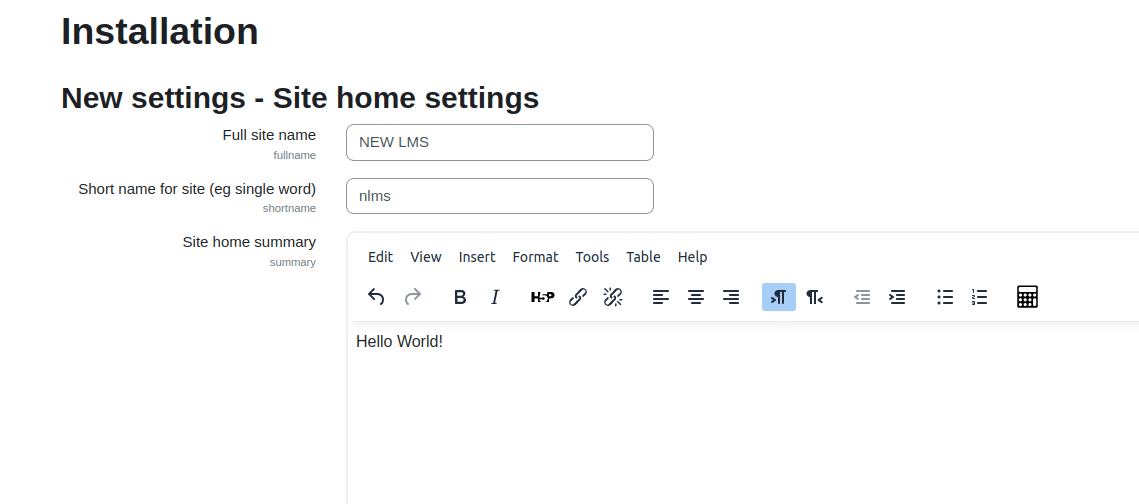
10. Nhập cài đặt trang chủ
Định cấu hình tên trang web, tên viết tắt cho trang web, tóm tắt trang chủ trang web và thông tin khác.
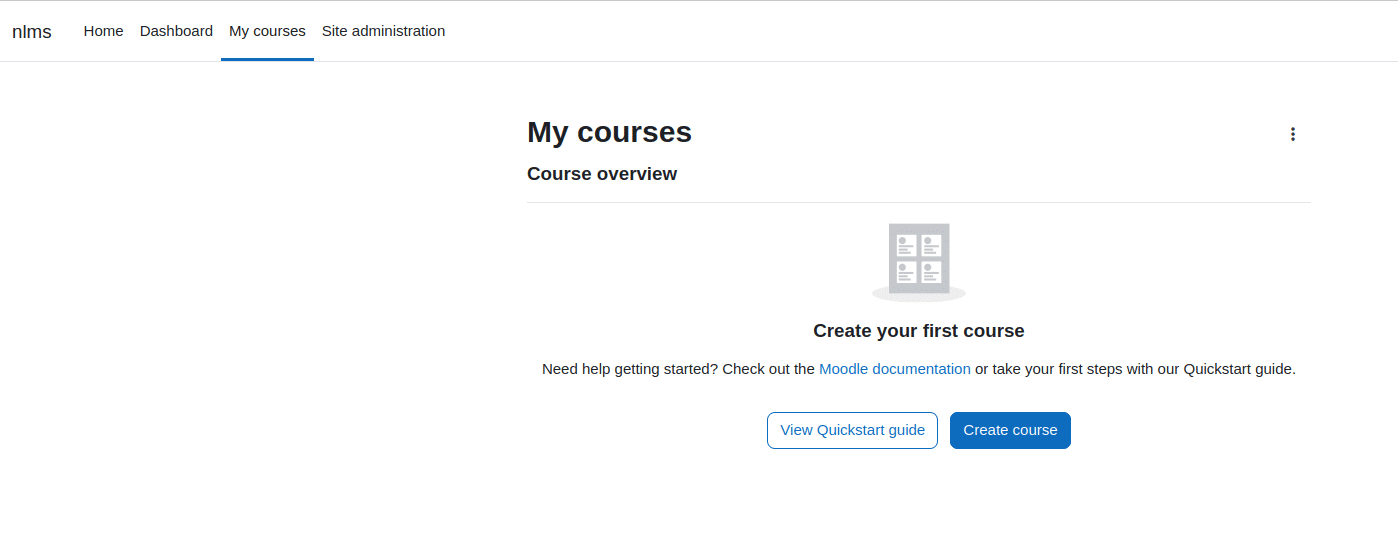
Tạo khóa học đầu tiên của bạn!
After few final clicks you will see the LMS dashboard and Calendar. Proceed to “My Courses” tab and create your first Moodle course! Well done!