
Canvas LMS installation is easy if you did it before. But for the first time it might be tough. If this is the first time you are trying to install Canvas LMS then you definitely need to read this Canvas LMS installation guide. Inside you will find lots of useful tips that will help you to setup Canvas LMS production server.
For this guide we will use a VPS with Ubuntu 22.04 LTS 64 bit. Server has 8GB of RAM and 4 CPU cores. It meets minimal hardware requirements for the open source Canvas LMS. We do not recommend installing Canvas on hardware with lower specs as the installation may fail. We also do not recommend to use OS other than Ubuntu. Canvas LMS Installation on Windows is not supported.
Before you begin the installation check out our Canvas LMS hosting service. The service offers managed cloud servers with open-source Canvas LMS pre-installed. You can start using the LMS without the hassle of setting up and managing own servers.
Canvas LMS Installation Steps
Update the system
First of all we should update the server and packages to the latest version.
# sudo apt update && apt upgrade -y
Install PostgreSQL database server
Next we install and configure PostgreSQL database server. When I write this article postgresql-14 is available.
# sudo apt-get install postgresql-14
Add postgresql database and a database user for Canvas. You will be asked to set a password for canvas database user.
# sudo -u postgres createuser canvas --no-createdb \
--no-superuser --no-createrole --pwprompt
# sudo -u postgres createdb canvas_production --owner=canvas
Download Canvas code to the server
We will use Git to get Canvas code. Install Git if you don’t have it already.
# sudo apt install git-core
On this step we will create a separate system user for Canvas LMS application. We will download Canvas code and install it under this account.
# useradd --create-home -s /bin/bash canvas
# chmod 711 /home/canvas
# su - canvas
Clone files from Canvas Github repository into public_html folder.
$ git clone https://github.com/instructure/canvas-lms.git /home/canvas/public_html
$ cd /home/canvas/public_html
$ git checkout prod
Install Canvas LMS dependencies
Switch back from “canvas” user to a sudo user and install ruby, Node.js, Bundler, Yarn and other Canvas LMS dependencies.
$ sudo apt-get install software-properties-common
$ sudo add-apt-repository ppa:instructure/ruby
$ sudo apt-get update
Install Ruby 3.1
$ sudo apt-get install ruby3.1 ruby3.1-dev zlib1g-dev libxml2-dev \
libsqlite3-dev postgresql libpq-dev \
libxmlsec1-dev libidn11-dev curl make g++
Install Node.js
$ curl -sL https://deb.nodesource.com/setup_16.x | sudo -E bash -
$ sudo apt-get install nodejs
$ sudo npm install -g npm@latest
Install Bundler and Ruby Gems
# sudo gem install bundler --version 2.3.26
# su - canvas
$ cd /home/canvas/public_html
$ bundle config set --local path vendor/bundle
$ bundle install
Install Yarn
# sudo npm -g install yarn
Install NodeJS dependencies
# su - canvas
$ cd /home/canvas/public_html
$ yarn install
Configure Canvas LMS
Copy Canvas default configuration files:
$ cd /home/canvas/public_html
$ for config in amazon_s3 database \
delayed_jobs domain file_store outgoing_mail security external_migration; \
do cp config/$config.yml.example config/$config.yml; done
Edit configuration files and enter relevant database settings, domain settings, outgoing mail server settings etc.
$ cp config/dynamic_settings.yml.example config/dynamic_settings.yml
$ vim config/dynamic_settings.yml
$ cp config/database.yml.example config/database.yml
$ vim config/database.yml$ cp config/outgoing_mail.yml.example config/outgoing_mail.yml
$ vim config/outgoing_mail.yml$ cp config/domain.yml.example config/domain.yml
$ vim config/domain.yml$ cp config/security.yml.example config/security.yml
$ vim config/security.ymlPopulate Canvas database
Run db:initial_setup to create database tables and populate database with initial data. On this step you will be asked to create Canvas administrator user.
$ mv db/migrate/20210823222355_change_immersive_reader_allowed_on_to_on.rb .
$ mv db/migrate/20210812210129_add_singleton_column.rb db/migrate/20111111214311_add_singleton_column.rb
$ yarn gulp rev
$ RAILS_ENV=production bundle exec rake db:initial_setup
$ mv 20210823222355_change_immersive_reader_allowed_on_to_on.rb db/migrate/.
$ RAILS_ENV=production bundle exec rake db:migrate
Generate Assets
Run canvas:compile_assets to generate template files.
$ mkdir -p log tmp/pids public/assets app/stylesheets/brandable_css_brands
$ touch app/stylesheets/_brandable_variables_defaults_autogenerated.scss
$ touch Gemfile.lock
$ touch log/production.log
$ RAILS_ENV=production bundle exec rake canvas:compile_assetsInstall Apache web server and Passenger
Next we need a webserver to serve Canvas. Nginx and Apache are the most popular options. We are going to install Apache + Passenger for this guide.
$ sudo apt-get install apache2
# Install our PGP key and add HTTPS support for APT
sudo apt-get install -y dirmngr gnupg apt-transport-https ca-certificates curl

curl https://oss-binaries.phusionpassenger.com/auto-software-signing-gpg-key.txt | gpg --dearmor | sudo tee /etc/apt/trusted.gpg.d/phusion.gpg >/dev/null

# Add our APT repository
sudo sh -c 'echo deb https://oss-binaries.phusionpassenger.com/apt/passenger jammy main > /etc/apt/sources.list.d/passenger.list'
sudo apt-get update

# Install Passenger + Apache module
sudo apt-get install -y libapache2-mod-passenger
Enable the Passenger Apache module and restart Apache.
sudo a2enmod passenger
sudo apache2ctl restart
Validate libapache2-mod-passenger the installation. Run commands below to make sure that the passenger and libapache2-mod-passenger module are installed correctly.
sudo /usr/bin/passenger-config validate-install
sudo /usr/sbin/passenger-memory-stats
Additionally enable mod_rewrite and mod_ssl for apache.
$ sudo a2enmod rewrite
$ sudo a2enmod ssl
Configure Canvas VirtualHost in Apache
Disable default Apache virtualhost configuration file and create a virtualhost configuration file for the canvas application.
$ sudo unlink /etc/apache2/sites-enabled/000-default.conf
$ sudo vim /etc/apache2/sites-available/canvas.conf
Copy configuration below into Canvas virtualhost configuration file. Replace ServerName, ServerAlias, ServerAdmin, DocumentRoot and other settings to match your domain name and app location.
<VirtualHost *:80>
ServerName canvas-test.webhostingzone.org
ServerAlias canvasfiles-test.webhostingzone.org
ServerAdmin youremail@example.com
DocumentRoot /home/canvas/public_html/public
RewriteEngine On
RewriteCond %{HTTP:X-Forwarded-Proto} !=https
RewriteCond %{REQUEST_URI} !^/health_check
RewriteRule (.*) https://%{HTTP_HOST}%{REQUEST_URI} [L]
ErrorLog /var/log/apache2/canvas_errors.log
LogLevel warn
CustomLog /var/log/apache2/canvas_access.log combined
PassengerPreloadBundler on
SetEnv RAILS_ENV production
<Directory /home/canvas/public_html/public>
Options All
AllowOverride All
Require all granted
</Directory>
</VirtualHost>
# If you are only serving HTTP behind a HTTPS-terminating load balancer, skip the next VirtualHost
<VirtualHost *:443>
ServerName canvas-test.webhostingzone.org
ServerAlias canvasfiles-test.webhostingzone.org
ServerAdmin youremail@example.com
DocumentRoot /home/canvas/public_html/public
ErrorLog /var/log/apache2/canvas_errors.log
LogLevel warn
CustomLog /var/log/apache2/canvas_ssl_access.log combined
SSLEngine on
BrowserMatch "MSIE [17-9]" ssl-unclean-shutdown
# the following ssl certificate files are generated for you from the ssl-cert package.
SSLCertificateFile /etc/ssl/certs/ssl-cert-snakeoil.pem
SSLCertificateKeyFile /etc/ssl/private/ssl-cert-snakeoil.key
PassengerPreloadBundler on
SetEnv RAILS_ENV production
<Directory /home/canvas/public_html/public>
Options All
AllowOverride All
Require all granted
</Directory>
</VirtualHost>
Enable Canvas virtual host
$ sudo a2ensite canvas
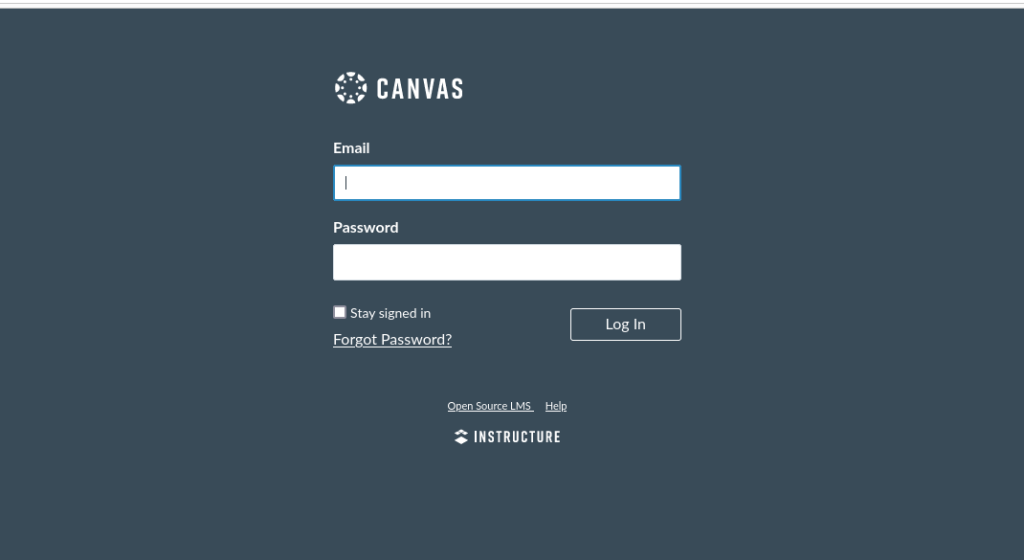
$ systemctl reload apache2 At this point you should be able to access Canvas via browser. Open your browser and type in a domain name that was specified in ServerName. Canvas default login page should appear.
Further Canvas Setup Steps
If Canvas login page is loaded in browser this is a good sign. But we need to complete few more tweaks to make the open source Canvas learning management system ready for production.
Install SSL certificate for Canvas
When Canvas domain name or sub-domain is pointed to server’s IP address we can proceed and install SSL certificate for Canvas LMS app. For this guide we will install a free LetsEncrypt SSL certificate.
Execute the following instructions on the command line on the machine to ensure that you have the latest version of snapd.
sudo snap install core; sudo snap refresh core
Remove certbot-auto and any Certbot OS packages
sudo apt-get remove certbot
Install Certbot
sudo snap install --classic certbot
sudo ln -s /snap/bin/certbot /usr/bin/certbot
Install SSL certificate for Canvas using certbot
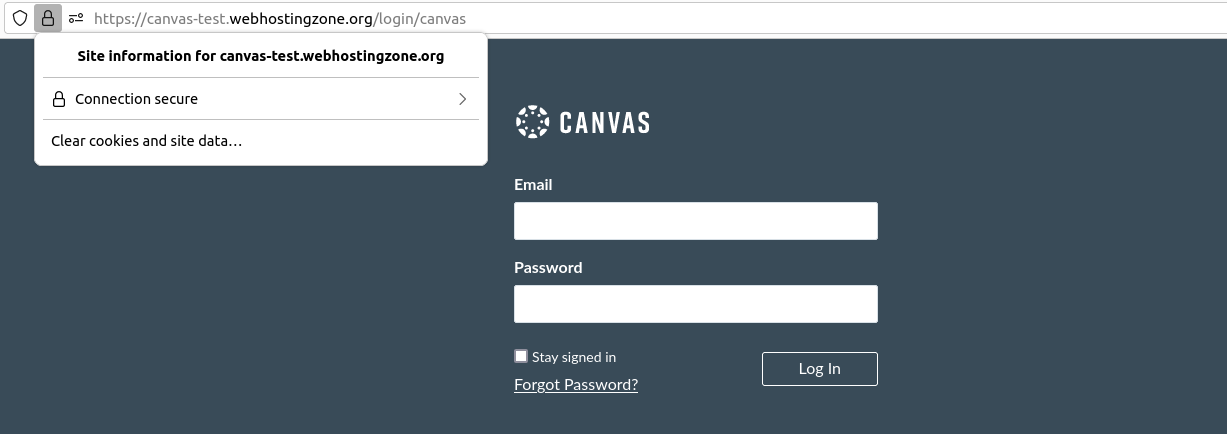
sudo certbot --apache
When SSL certificate is installed correctly you should see a lock icon and text “Connection secure” in a browser when accessing Canvas URI.
Install Redis cache server
It’s a good idea to install Redis cache server in order to optimize Canvas performance. Redis version 2.6.x or above is required. Add PPA repository and install Redis.
sysadmin@appserver:/var/canvas$ sudo add-apt-repository ppa:chris-lea/redis-server
sysadmin@appserver:/var/canvas$ sudo apt-get update
sysadmin@appserver:/var/canvas$ sudo apt-get install redis-server
Next go back to Canvas code directory and edit redis configuration files.
vim config/cache_store.yml
Add lines below into the file:
test:
  cache_store: redis_cache_store
development:
  cache_store: redis_cache_store
production:
  cache_store: redis_cache_store
Now edit redis.yml file and set path to redis server there.
vim config/redis.yml
If Redis is installed on the same server as Canvas then your configuration should be something like this. Replace localhost with redis server IP if you installed redis on external server.
production:
  servers:
    - redis://localhost
Save configuration file and restart Canvas to apply changes.
Install QTIMigrationTool for Canvas
Setup Canvas Automated jobs
Canvas automated jobs should be running in order to generate reports, send emails etc. Next commands will configure and start Canvas delayed jobs.
canvas$ sudo ln -s /home/canvas/public_html/script/canvas_init /etc/init.d/canvas_init
canvas$ sudo update-rc.d canvas_init defaults
canvas$ sudo /etc/init.d/canvas_init start
Install RCE API for Rich Content Editor
Troubleshooting Canvas Installation Errors
1. The application encountered the following error: You have already activated strscan 3.0.1, but your Gemfile requires strscan 3.0.6. Since strscan is a default gem, you can either remove your dependency on it or try updating to a newer version of bundler that supports strscan as a default gem. (Gem::LoadError)
Solution: preload Bundler with "PassengerPreloadBundler on" Apache configuration option
2. Common errors during compile assets: FrozenError: can’t modify frozen Array
Solution: delete Canvas project folder, download files from Github again and repeat installation steps.
Credits
- Canvas Production Start – https://github.com/instructure/canvas-lms/wiki/Production-Start
- Installing Passenger – https://www.phusionpassenger.com/docs/advanced_guides/install_and_upgrade/apache/install/oss/jammy.html
- Canvas LMS Installation Service – https://www.webhostingzone.org/solutions/canvas-lms-installation.html


