
התקנת Canvas LMS קלה אם עשית זאת בעבר. אבל בפעם הראשונה זה עלול להיות קשה. אם זו הפעם הראשונה שאתה מנסה להתקין את Canvas LMS אז אתה בהחלט צריך לקרוא את מדריך ההתקנה של Canvas LMS זה. בפנים תמצאו המון עצות שימושיות שיעזרו לכם להגדיר את שרת הייצור של Canvas LMS.
עבור מדריך זה נשתמש ב- a VPS עם אובונטו 22.04 LTS 64 סיביות. לשרת יש 8GB של זיכרון RAM ו-4 ליבות CPU. הוא עומד בדרישות חומרה מינימליות עבור Canvas LMS בקוד פתוח. אנו לא ממליצים להתקין את Canvas על חומרה עם מפרט נמוך יותר מכיוון שההתקנה עלולה להיכשל. אנחנו גם לא ממליצים להשתמש במערכת הפעלה אחרת מלבד אובונטו. התקנת Canvas LMS ב-Windows אינה נתמכת.
לפני שתתחיל בהתקנה בדוק את שלנו שירות אירוח Canvas LMS. השירות מציע שרתי ענן מנוהלים עם קוד פתוח Canvas LMS מותקן מראש. אתה יכול להתחיל להשתמש ב-LMS ללא הטרחה של הגדרה וניהול של שרתים משלך.
שלבי התקנת Canvas LMS
עדכן את המערכת
קודם כל עלינו לעדכן את השרת והחבילות לגרסה העדכנית ביותר.
# sudo apt update && apt upgrade -y
התקן את שרת מסד הנתונים PostgreSQL
לאחר מכן אנו מתקין ומגדיר את שרת מסד הנתונים PostgreSQL. כשאני כותב מאמר זה postgresql-14 זמין.
# sudo apt-get install postgresql-14
Add postgresql database and a database user for Canvas. You will be asked to set a password for canvas database user.
# sudo -u postgres createuser canvas --no-createdb \
--no-superuser --no-createrole --pwprompt
# sudo -u postgres createdb canvas_production --owner=canvas
הורד קוד Canvas לשרת
We will use Git to get Canvas code. Install Git if you don’t have it already.
# sudo apt install git-core
בשלב זה ניצור משתמש מערכת נפרד עבור אפליקציית Canvas LMS. נוריד את קוד Canvas ונתקין אותו תחת חשבון זה.
# useradd --create-home -s /bin/bash canvas
# chmod 711 /home/canvas
# su - canvas
Clone files from Canvas Github repository into public_html folder.
$ git clone https://github.com/instructure/canvas-lms.git /home/canvas/public_html
$ cd /home/canvas/public_html
$ git checkout prod
התקן תלות של Canvas LMS
Switch back from “canvas” user to a sudo user and install ruby, Node.js, Bundler, Yarn and other Canvas LMS dependencies.
$ sudo apt-get install software-properties-common
$ sudo add-apt-repository ppa:instructure/ruby
$ sudo apt-get update
התקן את Ruby 3.1
$ sudo apt-get install ruby3.1 ruby3.1-dev zlib1g-dev libxml2-dev \
libsqlite3-dev postgresql libpq-dev \
libxmlsec1-dev libidn11-dev curl make g++
התקן את Node.js
$ curl -sL https://deb.nodesource.com/setup_16.x | sudo -E bash -
$ sudo apt-get install nodejs
$ sudo npm install -g npm@latest
התקן את Bundler ו-Ruby Gems
# sudo gem install bundler --version 2.3.26
# su - canvas
$ cd /home/canvas/public_html
$ bundle config set --local path vendor/bundle
$ bundle install
התקן חוט
# sudo npm -g install yarn
התקן תלות של NodeJS
# su - canvas
$ cd /home/canvas/public_html
$ yarn install
הגדר את Canvas LMS
העתק את קובצי תצורת ברירת המחדל של Canvas:
$ cd /home/canvas/public_html
$ for config in amazon_s3 database \
delayed_jobs domain file_store outgoing_mail security external_migration; \
do cp config/$config.yml.example config/$config.yml; done
ערוך קבצי תצורה והזן הגדרות מסד נתונים רלוונטיות, הגדרות דומיין, הגדרות שרת דואר יוצא וכו'.
$ cp config/dynamic_settings.yml.example config/dynamic_settings.yml
$ vim config/dynamic_settings.yml
$ cp config/database.yml.example config/database.yml
$ vim config/database.yml$ cp config/outgoing_mail.yml.example config/outgoing_mail.yml
$ vim config/outgoing_mail.yml$ cp config/domain.yml.example config/domain.yml
$ vim config/domain.yml$ cp config/security.yml.example config/security.yml
$ vim config/security.ymlאכלוס מסד נתונים של Canvas
הפעל את db:initial_setup כדי ליצור טבלאות מסד נתונים ולאכלס את מסד הנתונים בנתונים ראשוניים. בשלב זה תתבקש ליצור משתמש מנהל Canvas.
$ mv db/migrate/20210823222355_change_immersive_reader_allowed_on_to_on.rb .
$ mv db/migrate/20210812210129_add_singleton_column.rb db/migrate/20111111214311_add_singleton_column.rb
$ yarn gulp rev
$ RAILS_ENV=production bundle exec rake db:initial_setup
$ mv 20210823222355_change_immersive_reader_allowed_on_to_on.rb db/migrate/.
$ RAILS_ENV=production bundle exec rake db:migrate
יצירת נכסים
הפעל canvas:compile_assets כדי ליצור קובצי תבנית.
$ mkdir -p log tmp/pids public/assets app/stylesheets/brandable_css_brands
$ touch app/stylesheets/_brandable_variables_defaults_autogenerated.scss
$ touch Gemfile.lock
$ touch log/production.log
$ RAILS_ENV=production bundle exec rake canvas:compile_assetsהתקן את שרת האינטרנט והנוסעים של Apache
בשלב הבא אנחנו צריכים שרת אינטרנט כדי לשרת את Canvas. Nginx ו- Apache הן האפשרויות הפופולריות ביותר. אנחנו הולכים להתקין את Apache Passenger עבור המדריך הזה.
$ sudo apt-get install apache2
# Install our PGP key and add HTTPS support for APT
sudo apt-get install -y dirmngr gnupg apt-transport-https ca-certificates curl

curl https://oss-binaries.phusionpassenger.com/auto-software-signing-gpg-key.txt | gpg --dearmor | sudo tee /etc/apt/trusted.gpg.d/phusion.gpg >/dev/null

# Add our APT repository
sudo sh -c 'echo deb https://oss-binaries.phusionpassenger.com/apt/passenger jammy main > /etc/apt/sources.list.d/passenger.list'
sudo apt-get update

# Install Passenger + Apache module
sudo apt-get install -y libapache2-mod-passenger
הפעל את מודול Passenger Apache והפעל מחדש את Apache.
sudo a2enmod passenger
sudo apache2ctl restart
אמת את ההתקנה של libapache2-mod-passager. הפעל את הפקודות למטה כדי לוודא שמודול הנוסע וה-libapache2-mod-passager מותקנים כהלכה.
sudo /usr/bin/passenger-config validate-install
sudo /usr/sbin/passenger-memory-stats
הפעל בנוסף mod_rewrite ו-mod_ssl עבור Apache.
$ sudo a2enmod rewrite
$ sudo a2enmod ssl
הגדר את Canvas VirtualHost ב- Apache
השבת את קובץ התצורה של Apache virtualhost כברירת מחדל וצור קובץ תצורה של virtualhost עבור יישום הקנבס.
$ sudo unlink /etc/apache2/sites-enabled/000-default.conf
$ sudo vim /etc/apache2/sites-available/canvas.conf
העתק את התצורה למטה לקובץ התצורה של Canvas virtualhost. החלף ServerName, ServerAlias, ServerAdmin, DocumentRoot והגדרות אחרות שיתאימו לשם הדומיין ולמיקום האפליקציה שלך.
<VirtualHost *:80>
ServerName canvas-test.webhostingzone.org
ServerAlias canvasfiles-test.webhostingzone.org
ServerAdmin youremail@example.com
DocumentRoot /home/canvas/public_html/public
RewriteEngine On
RewriteCond %{HTTP:X-Forwarded-Proto} !=https
RewriteCond %{REQUEST_URI} !^/health_check
RewriteRule (.*) https://%{HTTP_HOST}%{REQUEST_URI} [L]
ErrorLog /var/log/apache2/canvas_errors.log
LogLevel warn
CustomLog /var/log/apache2/canvas_access.log combined
PassengerPreloadBundler on
SetEnv RAILS_ENV production
<Directory /home/canvas/public_html/public>
Options All
AllowOverride All
Require all granted
</Directory>
</VirtualHost>
# If you are only serving HTTP behind a HTTPS-terminating load balancer, skip the next VirtualHost
<VirtualHost *:443>
ServerName canvas-test.webhostingzone.org
ServerAlias canvasfiles-test.webhostingzone.org
ServerAdmin youremail@example.com
DocumentRoot /home/canvas/public_html/public
ErrorLog /var/log/apache2/canvas_errors.log
LogLevel warn
CustomLog /var/log/apache2/canvas_ssl_access.log combined
SSLEngine on
BrowserMatch "MSIE [17-9]" ssl-unclean-shutdown
# the following ssl certificate files are generated for you from the ssl-cert package.
SSLCertificateFile /etc/ssl/certs/ssl-cert-snakeoil.pem
SSLCertificateKeyFile /etc/ssl/private/ssl-cert-snakeoil.key
PassengerPreloadBundler on
SetEnv RAILS_ENV production
<Directory /home/canvas/public_html/public>
Options All
AllowOverride All
Require all granted
</Directory>
</VirtualHost>
אפשר מארח וירטואלי של Canvas
$ sudo a2ensite canvas
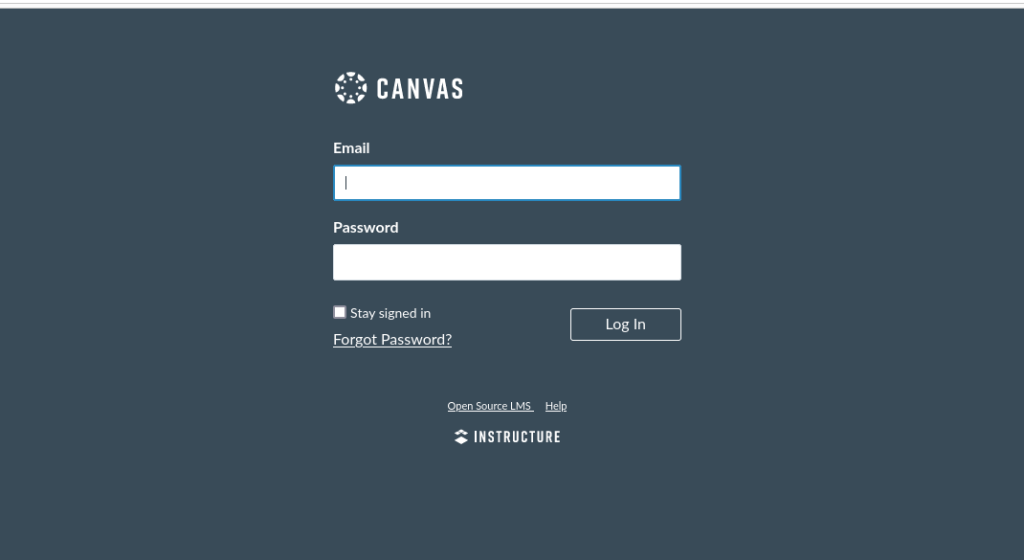
$ systemctl reload apache2 בשלב זה אתה אמור להיות מסוגל לגשת ל-Canvas דרך הדפדפן. פתח את הדפדפן שלך והקלד שם דומיין שצוין ב שם שרת. דף ההתחברות המוגדר כברירת מחדל של קנבס אמור להופיע.
שלבי הגדרת קנבס נוספים
אם דף הכניסה של Canvas נטען בדפדפן זה סימן טוב. אבל אנחנו צריכים להשלים עוד כמה שינויים כדי להפוך את מערכת ניהול הלמידה Canvas בקוד פתוח מוכנה לייצור.
התקן אישור SSL עבור Canvas
When Canvas domain name or sub-domain is pointed to server’s IP address we can proceed and install SSL certificate for Canvas LMS app. For this guide we will install a free LetsEncrypt SSL certificate.
בצע את ההוראות הבאות בשורת הפקודה במחשב כדי לוודא שיש לך את הגרסה העדכנית ביותר של snapd.
sudo snap install core; sudo snap refresh core
הסר את certbot-auto וכל חבילות Certbot OS
sudo apt-get remove certbot
התקן את Certbot
sudo snap install --classic certbot
sudo ln -s /snap/bin/certbot /usr/bin/certbot
התקן אישור SSL עבור Canvas באמצעות certbot
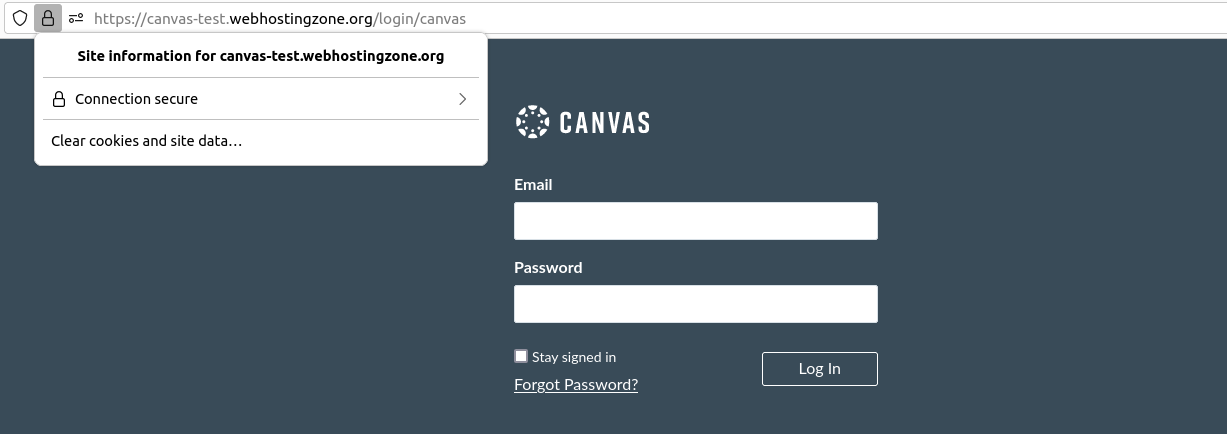
sudo certbot --apache
When SSL certificate is installed correctly you should see a lock icon and text “Connection secure” in a browser when accessing Canvas URI.
התקן את שרת המטמון של Redis
It’s a good idea to install Redis cache server in order to optimize Canvas performance. Redis version 2.6.x or above is required. Add PPA repository and install Redis.
sysadmin@appserver:/var/canvas$ sudo add-apt-repository ppa:chris-lea/redis-server
sysadmin@appserver:/var/canvas$ sudo apt-get update
sysadmin@appserver:/var/canvas$ sudo apt-get install redis-server
לאחר מכן חזור לספריית קוד Canvas וערוך קובצי תצורה של Redis.
vim config/cache_store.yml
הוסף שורות למטה לקובץ:
test:
  cache_store: redis_cache_store
development:
  cache_store: redis_cache_store
production:
  cache_store: redis_cache_store
כעת ערוך את קובץ redis.yml והגדר נתיב לשרת redis שם.
vim config/redis.yml
אם Redis מותקן על אותו שרת כמו Canvas אז התצורה שלך צריכה להיות משהו כזה. החלף את localhost בשרת redis IP אם התקנת את redis בשרת חיצוני.
production:
  servers:
    - redis://localhost
שמור את קובץ התצורה והפעל מחדש את Canvas כדי להחיל שינויים.
התקן QTIMigrationTool for Canvas
הגדר משרות אוטומטיות של Canvas
משרות אוטומטיות של Canvas אמורות לפעול על מנת להפיק דוחות, לשלוח מיילים וכו'. הפקודות הבאות יגדירו ויתחילו משרות מושהות של Canvas.
canvas$ sudo ln -s /home/canvas/public_html/script/canvas_init /etc/init.d/canvas_init
canvas$ sudo update-rc.d canvas_init defaults
canvas$ sudo /etc/init.d/canvas_init start
התקן RCE API עבור עורך תוכן עשיר
פתרון בעיות בהתקנת קנבס
1. היישום נתקל בשגיאה הבאה: כבר הפעלת את strscan 3.0.1, אבל Gemfile שלך דורש strscan 3.0.6. מכיוון שstrscan הוא אבן חן ברירת מחדל, אתה יכול להסיר את התלות שלך בה או לנסות לעדכן לגרסה חדשה יותר של bundler שתומכת ב-strscan כפנינה כברירת מחדל. (Gem::LoadError)
Solution: preload Bundler with "PassengerPreloadBundler on" Apache configuration option
2. Common errors during compile assets: FrozenError: can’t modify frozen Array
Solution: delete Canvas project folder, download files from Github again and repeat installation steps.
קרדיטים
- Canvas Production Start – https://github.com/instructure/canvas-lms/wiki/Production-Start
- Installing Passenger – https://www.phusionpassenger.com/docs/advanced_guides/install_and_upgrade/apache/install/oss/jammy.html
- Canvas LMS Installation Service – https://www.webhostingzone.org/solutions/canvas-lms-installation.html


