
이전에 해본 적이 있다면 Canvas LMS 설치가 쉽습니다. 하지만 처음에는 어려울 수도 있습니다. Canvas LMS를 처음 설치하는 경우 이 Canvas LMS 설치 가이드를 꼭 읽어보세요. 내부에는 Canvas LMS 프로덕션 서버를 설정하는 데 도움이 되는 많은 유용한 팁이 있습니다.
이 가이드에서는 VPS ~와 함께 우분투 22.04 LTS 64비트. 서버에는 8GB RAM과 4개의 CPU 코어가 있습니다. 오픈 소스 Canvas LMS에 대한 최소 하드웨어 요구 사항을 충족합니다. 사양이 낮은 하드웨어에는 Canvas 설치가 실패할 수 있으므로 권장하지 않습니다. 또한 Ubuntu 이외의 OS 사용을 권장하지 않습니다. Windows에서는 Canvas LMS 설치가 지원되지 않습니다.
설치를 시작하기 전에 당사의 캔버스 LMS 호스팅 서비스. 이 서비스는 오픈 소스 Canvas LMS가 사전 설치된 관리형 클라우드 서버를 제공합니다. 자체 서버를 설정하고 관리하는 번거로움 없이 LMS 사용을 시작할 수 있습니다.
캔버스 LMS 설치 단계
시스템 업데이트
우선 서버와 패키지를 최신 버전으로 업데이트해야 합니다.
# sudo apt update && apt upgrade -y
PostgreSQL 데이터베이스 서버 설치
다음으로 PostgreSQL 데이터베이스 서버를 설치하고 구성합니다. 제가 이 글을 쓰고 있는 시점에는 postgresql-14를 사용할 수 있습니다.
# sudo apt-get install postgresql-14
Add postgresql database and a database user for Canvas. You will be asked to set a password for canvas database user.
# sudo -u postgres createuser canvas --no-createdb \
--no-superuser --no-createrole --pwprompt
# sudo -u postgres createdb canvas_production --owner=canvas
캔버스 코드를 서버에 다운로드
We will use Git to get Canvas code. Install Git if you don’t have it already.
# sudo apt install git-core
이 단계에서는 Canvas LMS 애플리케이션에 대한 별도의 시스템 사용자를 생성합니다. Canvas 코드를 다운로드하여 이 계정에 설치하겠습니다.
# useradd --create-home -s /bin/bash canvas
# chmod 711 /home/canvas
# su - canvas
Clone files from Canvas Github repository into public_html folder.
$ git clone https://github.com/instructure/canvas-lms.git /home/canvas/public_html
$ cd /home/canvas/public_html
$ git checkout prod
Canvas LMS 종속성 설치
Switch back from “canvas” user to a sudo user and install ruby, Node.js, Bundler, Yarn and other Canvas LMS dependencies.
$ sudo apt-get install software-properties-common
$ sudo add-apt-repository ppa:instructure/ruby
$ sudo apt-get update
루비 3.1 설치
$ sudo apt-get install ruby3.1 ruby3.1-dev zlib1g-dev libxml2-dev \
libsqlite3-dev postgresql libpq-dev \
libxmlsec1-dev libidn11-dev curl make g++
Node.js 설치
$ curl -sL https://deb.nodesource.com/setup_16.x | sudo -E bash -
$ sudo apt-get install nodejs
$ sudo npm install -g npm@latest
Bundler 및 Ruby Gems 설치
# sudo gem install bundler --version 2.3.26
# su - canvas
$ cd /home/canvas/public_html
$ bundle config set --local path vendor/bundle
$ bundle install
원사 설치
# sudo npm -g install yarn
NodeJS 종속성 설치
# su - canvas
$ cd /home/canvas/public_html
$ yarn install
캔버스 LMS 구성
캔버스 기본 구성 파일을 복사합니다.
$ cd /home/canvas/public_html
$ for config in amazon_s3 database \
delayed_jobs domain file_store outgoing_mail security external_migration; \
do cp config/$config.yml.example config/$config.yml; done
구성 파일을 편집하고 관련 데이터베이스 설정, 도메인 설정, 보내는 메일 서버 설정 등을 입력합니다.
$ cp config/dynamic_settings.yml.example config/dynamic_settings.yml
$ vim config/dynamic_settings.yml
$ cp config/database.yml.example config/database.yml
$ vim config/database.yml$ cp config/outgoing_mail.yml.example config/outgoing_mail.yml
$ vim config/outgoing_mail.yml$ cp config/domain.yml.example config/domain.yml
$ vim config/domain.yml$ cp config/security.yml.example config/security.yml
$ vim config/security.yml캔버스 데이터베이스 채우기
db:initial_setup을 실행하여 데이터베이스 테이블을 생성하고 데이터베이스를 초기 데이터로 채웁니다. 이 단계에서는 Canvas 관리자를 생성하라는 메시지가 표시됩니다.
$ mv db/migrate/20210823222355_change_immersive_reader_allowed_on_to_on.rb .
$ mv db/migrate/20210812210129_add_singleton_column.rb db/migrate/20111111214311_add_singleton_column.rb
$ yarn gulp rev
$ RAILS_ENV=production bundle exec rake db:initial_setup
$ mv 20210823222355_change_immersive_reader_allowed_on_to_on.rb db/migrate/.
$ RAILS_ENV=production bundle exec rake db:migrate
자산 생성
canvas:compile_assets를 실행하여 템플릿 파일을 생성합니다.
$ mkdir -p log tmp/pids public/assets app/stylesheets/brandable_css_brands
$ touch app/stylesheets/_brandable_variables_defaults_autogenerated.scss
$ touch Gemfile.lock
$ touch log/production.log
$ RAILS_ENV=production bundle exec rake canvas:compile_assetsApache 웹 서버 및 Passenger 설치
다음으로 Canvas를 제공할 웹서버가 필요합니다. Nginx와 Apache가 가장 인기 있는 옵션입니다. 이 가이드에서는 Apache Passenger를 설치하겠습니다.
$ sudo apt-get install apache2
# Install our PGP key and add HTTPS support for APT
sudo apt-get install -y dirmngr gnupg apt-transport-https ca-certificates curl

curl https://oss-binaries.phusionpassenger.com/auto-software-signing-gpg-key.txt | gpg --dearmor | sudo tee /etc/apt/trusted.gpg.d/phusion.gpg >/dev/null

# Add our APT repository
sudo sh -c 'echo deb https://oss-binaries.phusionpassenger.com/apt/passenger jammy main > /etc/apt/sources.list.d/passenger.list'
sudo apt-get update

# Install Passenger + Apache module
sudo apt-get install -y libapache2-mod-passenger
Passenger Apache 모듈을 활성화하고 Apache를 다시 시작합니다.
sudo a2enmod passenger
sudo apache2ctl restart
libapache2-mod-passenger 설치를 확인합니다. 아래 명령을 실행하여 승객 및 libapache2-mod-passenger 모듈이 올바르게 설치되었는지 확인하세요.
sudo /usr/bin/passenger-config validate-install
sudo /usr/sbin/passenger-memory-stats
또한 Apache에 대해 mod_rewrite 및 mod_ssl을 활성화합니다.
$ sudo a2enmod rewrite
$ sudo a2enmod ssl
Apache에서 Canvas VirtualHost 구성
기본 Apache 가상 호스트 구성 파일을 비활성화하고 캔버스 애플리케이션에 대한 가상 호스트 구성 파일을 만듭니다.
$ sudo unlink /etc/apache2/sites-enabled/000-default.conf
$ sudo vim /etc/apache2/sites-available/canvas.conf
아래 구성을 Canvas virtualhost 구성 파일에 복사하십시오. 바꾸다 ServerName, ServerAlias, ServerAdmin, DocumentRoot 도메인 이름 및 앱 위치와 일치하는 기타 설정.
<VirtualHost *:80>
ServerName canvas-test.webhostingzone.org
ServerAlias canvasfiles-test.webhostingzone.org
ServerAdmin youremail@example.com
DocumentRoot /home/canvas/public_html/public
RewriteEngine On
RewriteCond %{HTTP:X-Forwarded-Proto} !=https
RewriteCond %{REQUEST_URI} !^/health_check
RewriteRule (.*) https://%{HTTP_HOST}%{REQUEST_URI} [L]
ErrorLog /var/log/apache2/canvas_errors.log
LogLevel warn
CustomLog /var/log/apache2/canvas_access.log combined
PassengerPreloadBundler on
SetEnv RAILS_ENV production
<Directory /home/canvas/public_html/public>
Options All
AllowOverride All
Require all granted
</Directory>
</VirtualHost>
# If you are only serving HTTP behind a HTTPS-terminating load balancer, skip the next VirtualHost
<VirtualHost *:443>
ServerName canvas-test.webhostingzone.org
ServerAlias canvasfiles-test.webhostingzone.org
ServerAdmin youremail@example.com
DocumentRoot /home/canvas/public_html/public
ErrorLog /var/log/apache2/canvas_errors.log
LogLevel warn
CustomLog /var/log/apache2/canvas_ssl_access.log combined
SSLEngine on
BrowserMatch "MSIE [17-9]" ssl-unclean-shutdown
# the following ssl certificate files are generated for you from the ssl-cert package.
SSLCertificateFile /etc/ssl/certs/ssl-cert-snakeoil.pem
SSLCertificateKeyFile /etc/ssl/private/ssl-cert-snakeoil.key
PassengerPreloadBundler on
SetEnv RAILS_ENV production
<Directory /home/canvas/public_html/public>
Options All
AllowOverride All
Require all granted
</Directory>
</VirtualHost>
캔버스 가상 호스트 활성화
$ sudo a2ensite canvas
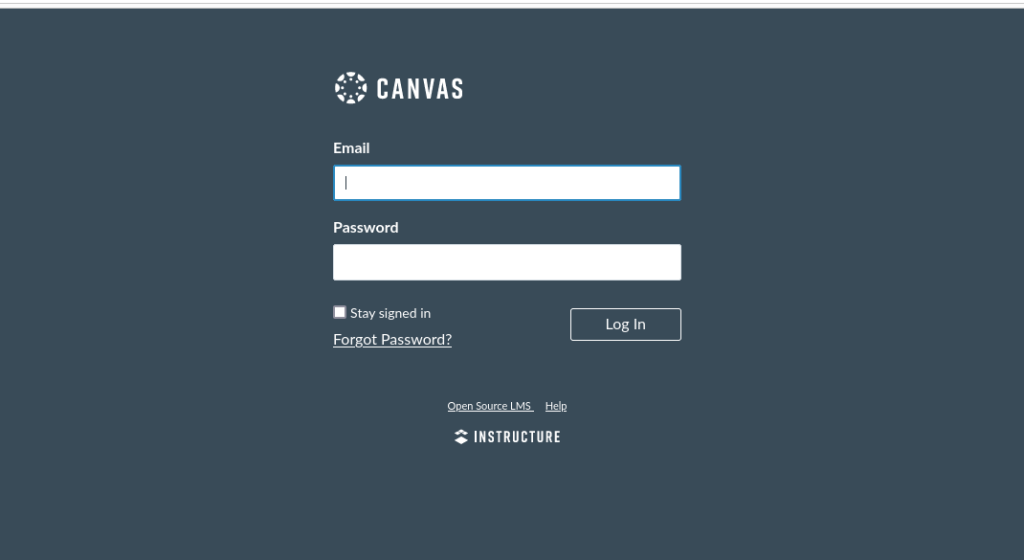
$ systemctl reload apache2 이제 브라우저를 통해 Canvas에 액세스할 수 있습니다. 브라우저를 열고 다음에 지정된 도메인 이름을 입력하세요. 서버 이름. 캔버스 기본 로그인 페이지가 나타나야 합니다.
추가 캔버스 설정 단계
Canvas 로그인 페이지가 브라우저에 로드되면 이는 좋은 신호입니다. 하지만 오픈 소스 Canvas 학습 관리 시스템을 프로덕션에 사용할 수 있도록 하려면 몇 가지 추가 조정을 완료해야 합니다.
Canvas용 SSL 인증서 설치
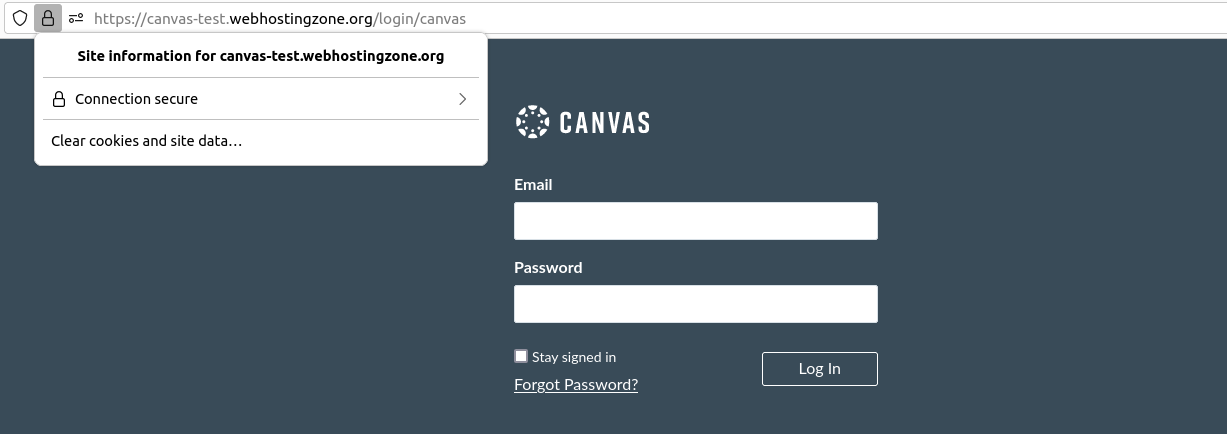
When Canvas domain name or sub-domain is pointed to server’s IP address we can proceed and install SSL certificate for Canvas LMS app. For this guide we will install a free LetsEncrypt SSL certificate.
최신 버전의 snapd가 있는지 확인하려면 머신의 명령줄에서 다음 지침을 실행하세요.
sudo snap install core; sudo snap refresh core
certbot-auto 및 모든 Certbot OS 패키지 제거
sudo apt-get remove certbot
Certbot 설치
sudo snap install --classic certbot
sudo ln -s /snap/bin/certbot /usr/bin/certbot
certbot을 사용하여 Canvas용 SSL 인증서 설치
sudo certbot --apache
When SSL certificate is installed correctly you should see a lock icon and text “Connection secure” in a browser when accessing Canvas URI.
Redis 캐시 서버 설치
It’s a good idea to install Redis cache server in order to optimize Canvas performance. Redis version 2.6.x or above is required. Add PPA repository and install Redis.
sysadmin@appserver:/var/canvas$ sudo add-apt-repository ppa:chris-lea/redis-server
sysadmin@appserver:/var/canvas$ sudo apt-get update
sysadmin@appserver:/var/canvas$ sudo apt-get install redis-server
다음으로 Canvas 코드 디렉터리로 돌아가서 Redis 구성 파일을 편집합니다.
vim config/cache_store.yml
파일에 아래 줄을 추가합니다.
test:
  cache_store: redis_cache_store
development:
  cache_store: redis_cache_store
production:
  cache_store: redis_cache_store
이제 redis.yml 파일을 편집하고 거기에 redis 서버 경로를 설정하십시오.
vim config/redis.yml
Redis가 Canvas와 동일한 서버에 설치된 경우 구성은 다음과 같아야 합니다. 외부 서버에 Redis를 설치한 경우 localhost를 Redis 서버 IP로 바꾸십시오.
production:
  servers:
    - redis://localhost
구성 파일을 저장하고 Canvas를 다시 시작하여 변경 사항을 적용하세요.
캔버스용 QTIMigrationTool 설치
캔버스 자동화 작업 설정
보고서 생성, 이메일 보내기 등을 위해서는 캔버스 자동화 작업이 실행되어야 합니다. 다음 명령은 캔버스 지연 작업을 구성하고 시작합니다.
canvas$ sudo ln -s /home/canvas/public_html/script/canvas_init /etc/init.d/canvas_init
canvas$ sudo update-rc.d canvas_init defaults
canvas$ sudo /etc/init.d/canvas_init start
Rich Content Editor용 RCE API 설치
캔버스 설치 오류 문제 해결
1. 애플리케이션에서 다음 오류가 발생했습니다. 이미 strscan 3.0.1을 활성화했지만 Gemfile에는 strscan 3.0.6이 필요합니다. strscan은 기본 gem이므로 이에 대한 종속성을 제거하거나 strscan을 기본 gem으로 지원하는 최신 버전의 번들러로 업데이트해 보세요. (젬::로드오류)
Solution: preload Bundler with "PassengerPreloadBundler on" Apache configuration option
2. Common errors during compile assets: FrozenError: can’t modify frozen Array
Solution: delete Canvas project folder, download files from Github again and repeat installation steps.
크레딧
- Canvas Production Start – https://github.com/instructure/canvas-lms/wiki/Production-Start
- Installing Passenger – https://www.phusionpassenger.com/docs/advanced_guides/install_and_upgrade/apache/install/oss/jammy.html
- Canvas LMS Installation Service – https://www.webhostingzone.org/solutions/canvas-lms-installation.html


